Manage Column Names
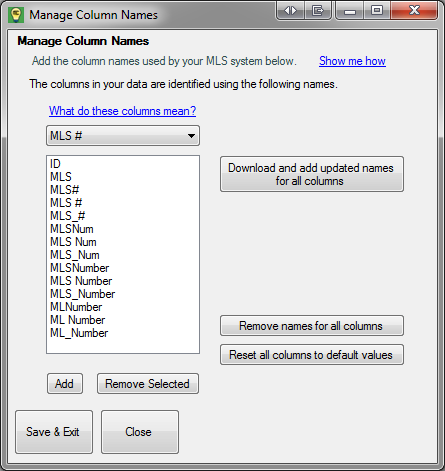
Manage Column Names screen
What columns are recognized by Dynamo MC™?
The following fields are recognized:
- MLS # – The MLS listing number used to identify a property.
- This could also be any generic name used to identify a property (other than “Address”) in your analysis.
- Address – The physical address or other description of a property.
- If your MLS breaks up the address into multiple pieces, you can specify all of these as “Address”. These fields will be combined back together in the order in which they occurred in your data file.
- Unit – The unit number on the address, if present.
- This will be appended to the end of the address (when present) for reporting purposes.
- Status – The current status of a listing as defined by your MLS or data source.
- The names of your statuses will be matched to statuses recognized for analysis. You can learn more about status names here.
- Price List – The price a property was listed at on the MLS or the asking price of a property.
- Price Sold – The price a property sold for. This applies to closed sales only.
- GLA (Gross Living Area) – The amount of above grade living area belonging to a property (in square feet).
- Year Built – The year that the home was built.
- Date Listed – The date a property was placed on the market or first advertised for sale.
- Date Closed – The date a sale was closed or finalized.
- Date Pending – The date an agreement for sale was reached, with closing to occur on the same date or a future date.
- Date Inactive – The date a listing was withdrawn from or expired from the MLS or otherwise made inactive.
How does Dynamo MC use these columns?
Dynamo MC™ looks at the data provided for each property to determine the listing history for your market. Dynamo MC™ recognizes most of the column names used by MLS systems, and we add new column names to our database every day to keep our program easy for new appraisers to use. However, because MLS systems are so different, sometimes a column name comes along that Dynamo MC™ does not recognize. If this happens, you will need to teach these column names to the program on the “Manage Column Names” page.
You can access this page by clicking the “Manage column names” button on step 3, or by clicking “Manage Column Names” under the “Tools” menu.
Using the Manage Column Names screen
You can see all of the column names that Dynamo MC™ recognizes on this screen. The column names shown will be different for your copy of Dynamo MC™. The screen will display the recognized column names for one column at a time. To see a different column, please use select the column you would like to see using the select list shown below.
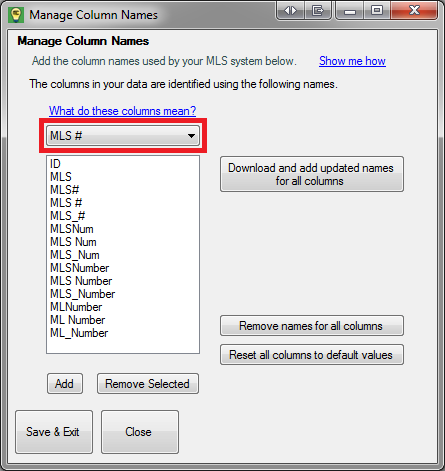
Change the column displayed by clicking here
You will now see all recognized column names for this column. You may add and remove column names here.
Please be aware that you must click “Save & Exit” when leaving for your settings to be saved. If you have made changes, Dynamo MC™ will remind you that leaving this screen will cause your changes to be lost. If you make a mistake, you can easily reset your changes by closing (without saving) and coming back to this screen.
What to do when you are missing a column
When Dynamo MC™ indicates that it is missing a column in your MLS data, you should first look at your MLS data to locate the missing column. It may be helpful to also look at the columns that Dynamo MC™ already recognizes for this column, as it may give you a better idea what you should be looking for.
In some cases, you may not be able to find the appropriate column in your export. If this happens, you may have to go back to your MLS and add additional columns to your export. Please consider contacting your MLS directly for more help. If it is easier for you, you may also contact us at support@dynamoappraiser.com, and we will help you to set up your export.
Adding a column name
There are actually two ways to add a column name in Dynamo MC™. Most of the time, this is accomplished by simply choosing a column on the select step. You may notice that you can see columns you have added during this step in the “Manage Column Names” screen.
The other way to add a column name is accomplished within the “Manage Column Name” screen. To add a column this way, first select the appropriate column using the select list (shown above). You will now see a list of any recognized column names here.
To Add a new column name, click the “Add” button when the appropriate column is selected.
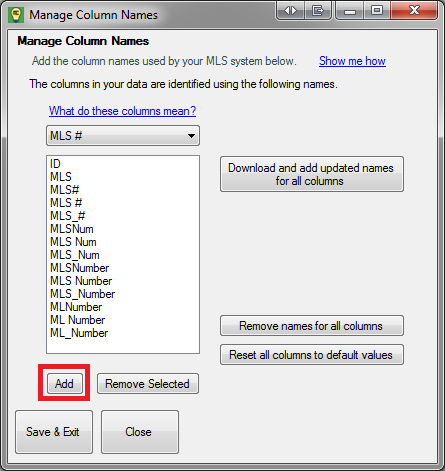
Add a column name by clicking here
You will be presented with a dialog that allows you to type in the name of the column you would like to use. It does not matter if you use upper or lower case characters here, as they are all treated the same.
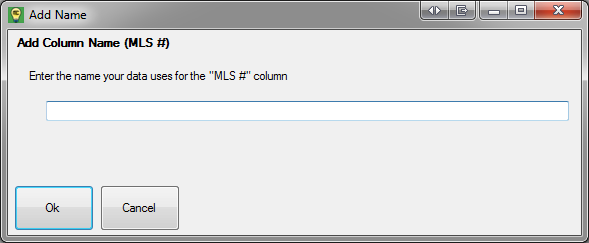
Adding a column name
When you click “Ok”, your new column name will be added to the current list and will now be recognized by Dynamo MC™. However, if this name was already being used, you may see one of the following errors:
This column name already exists in this list
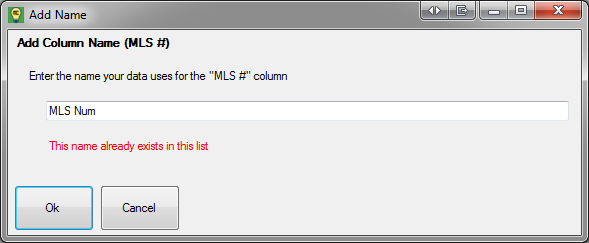
The column name already exists in this list
You can safely ignore this error, because the column name you were attempting to add is already in place. There is no action you need to take here.
This column name already exists in another list
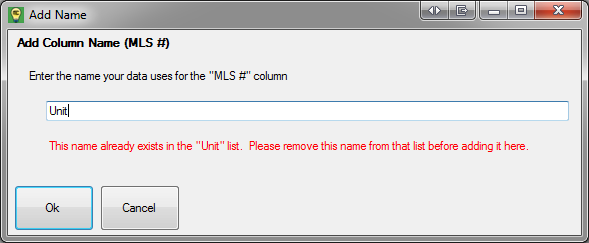
The column name already exists in another list
This error indicates that the column name you are attempting to add is already being used by another column. A column name can only be used by one column at a time. You will need to determine which column this column name should belong to, and if necessary, remove it from the other column before adding it here.
Please keep in mind that you can drastically alter the way Dynamo MC™ performs calculations on your data by manipulating the column names. Please always do your due diligence to ensure that the columns you add are correct and representative of how your MLS uses them.
Removing a column name
If you discover that the column names in Dynamo MC™ do not accurately reflect the column names used by your MLS, or if you ever make a mistake when adding a column name, you may wish to remove a column name.
To remove a column name, simply select the appropriate column using the select list (shown above). Then select one (or more) column names from the list. Then click the “Remove Selected” button, and any selected entries will be removed from the list.
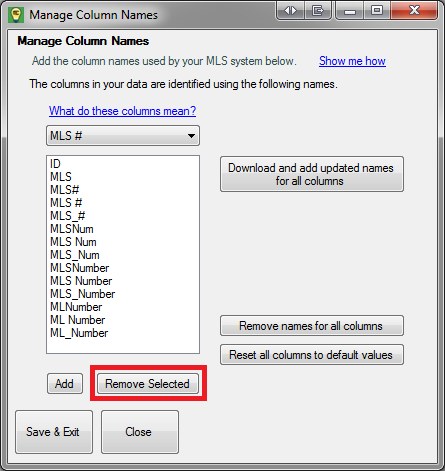
Remove a column name by clicking here
Downloading updated column names
When you ran Dynamo MC™ for the first time, an updated list of all recognized column names was automatically retrieved and stored from the internet. This only happens the very first time you run the program so that it doesn’t interfere with your column names once you get them working properly.
If your computer was not connected to the internet when you first ran Dynamo MC™, you may want to retrieve them using the “Download and add updated names for all columns” button. Keep in mind that this will only add column names that are not currently used on your system, and any existing values will remain as they are now.
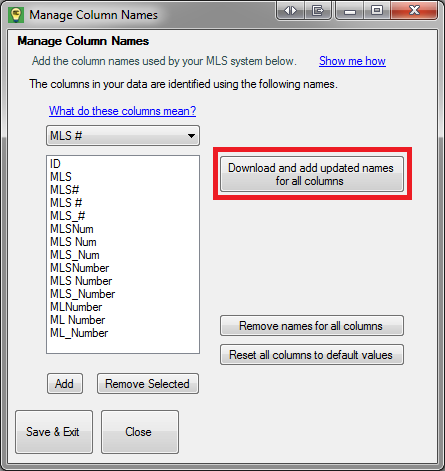
Download updated column names by clicking here
Remove names for all columns
If you ever want to completely erase all of the recognized column names from all columns, you may click the “Remove names for all columns” button. Please keep in mind that this is in most cases not necessary, as Dynamo MC™ will safely ignore values that you are not using when selecting the columns in your data.
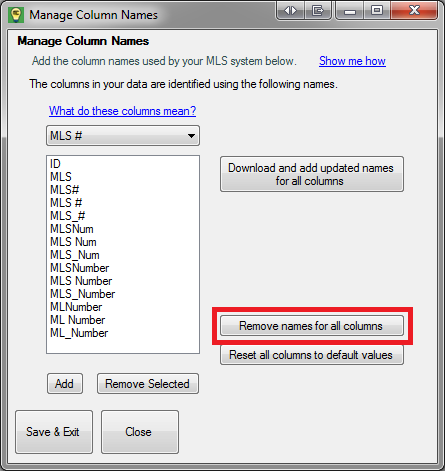
Remove all column names by clicking here
Resetting all column names
You may choose to reset all column names to their initial values by clicking the “Reset all columns to default values” button. This will remove any column names that you have entered, as well as any that were downloaded by Dynamo MC™. It is almost always a good idea to download the updated column names after doing this, as you will benefit from more of the column names in your data being automatically recognized.
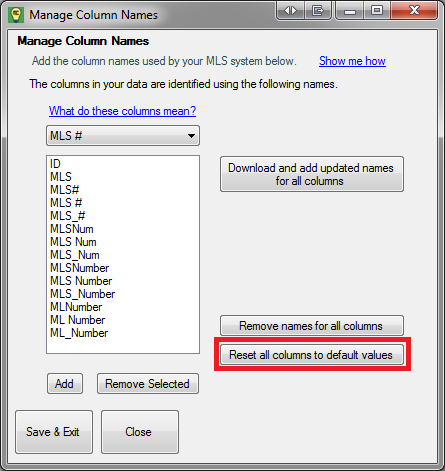
Reset all column names to their default values by clicking here
Finishing up
Remember that you must click “Save & Exit” when leaving for your changes to be saved. If you have made changes, Dynamo MC™ will remind you that leaving this screen will cause your changes to be lost.

